Menu

Adding a Sender to the Allow or Deny Lists in Hornet Email Security

In today's digital age, managing your inbox effectively is crucial for productivity and security.

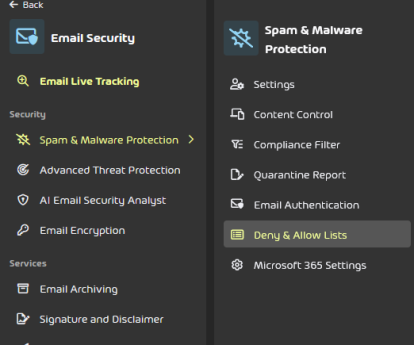
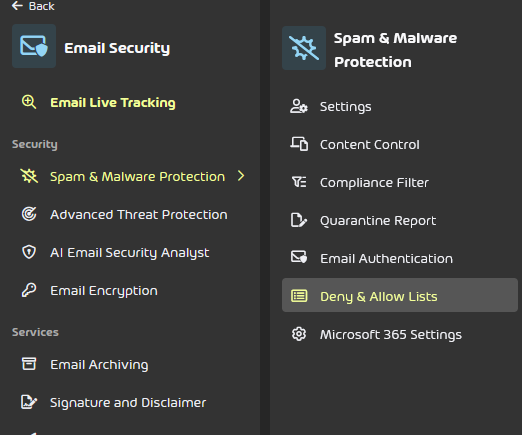
Hornet Email Security provides robust tools to help you filter unwanted messages and prioritise legitimate communication. One of the most powerful features at your disposal is the ability to specifically "Allow" or "Deny" senders.

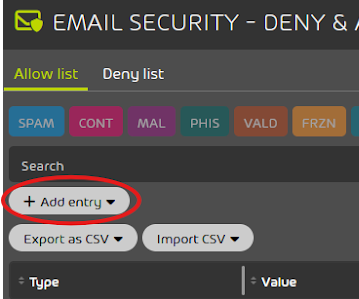
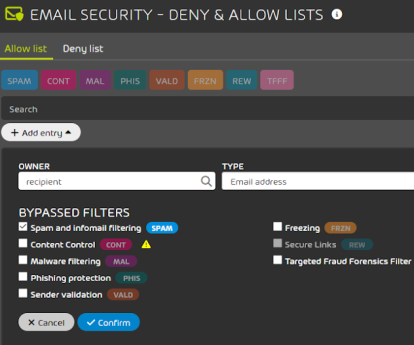
This guide will walk you through the simple steps of adding senders to these lists, empowering you to take control of your email flow, reduce spam, and ensure that critical messages from trusted contacts always make it through.

Updated 26/06/25

  • Step-by-step Guide
Inception - Adding a Sender to the Allow or Deny Lists in Hornet Email Security

1. Go to Hornet Security and navigate to Email Security > Spam & Malware Protection > Deny & Allow Lists

Inception - Adding a Sender to the Allow or Deny Lists in Hornet Email Security

2. Click on “Add Entry”

Inception - Adding a Sender to the Allow or Deny Lists in Hornet Email Security

3. Add the sender’s email address under “Value” and the recipient’s email address under “Owner” (If Owner is left blank, this allow list entry will apply to everyone), and then apply any bypass filters which are required. (We suggest only using spam.)

Then click Confirm.

Scroll across table

Take control of your printing.

Experience the full potential of print technology with our Managed Print Services.

Get in touch with an expert today.

Complete our form, and a member of our team will contact you to discuss your IT and managed print needs.

This field is required

Can we stay in touch?

Are you happy to be added to our mailing list where we can keep you up to date via our newsletter? You can unsubscribe at any time.